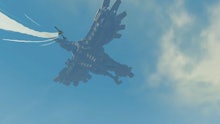
'Zelda: Breath of the Wild' Vah Medoh Walkthrough Guide: How to complete the Rito dungeon

Vah Medoh is one of The Legend of Zelda: Breath of the Wild's four divine beasts, a gigantic airship that serves as one of the main story's dungeons. Aside from providing fun puzzle challenges and a rather sweet special ability for beating it, you'll also have an easier time fighting Calamity Ganon at the end of the game.
Here's a guide for making your way through Vah Medoh in Breath of the Wild, courtesy of my playthrough and Polygon.
Zelda: Breath of the Wild Vah Medoh walkthrough: Getting started
As with the other three divine beasts, your goal is to access the map terminal and then activate five additional terminals to take back control of the beast. However, you have some housekeeping to do first.
Go to the central area, shoot the malice eyeball and drop into the lower level. Kill another eyeball to unlock an exit. Walk around the perimeter outside, shooting any eyeballs you come across. One will unlock a fan you can use to fly upward, while another will unlock a way back into the previous room.
Fly back into the first room and use magnesis to pull one of the metal blocks to the middle so you can get across to the other side. Kill the small guardian and keep moving forward to unlock the map. At this point, you'll find out you can move Vah Medoh between three positions: tilted high, tilted low and leveled off. Now it's time to activate those terminals.
Zelda: Breath of the Wild Vah Medoh walkthrough: First terminal
Stand near the drop-off from the map terminal and tilt Medoh to the high position. Shoot the eyeball on the ceiling before pulling the leftmost magnetic block toward you. Tilt Medoh the other way to get to the climbable wall and paraglide into the room you just unlocked, which contains an eyeball you should immediately deal with.
Re-adjust Medoh back to the level position and walk up the ramp in this room. Shooting the switch will open a gust of air you can use to paraglide your way to the terminal on the room's other side.
Zelda: Breath of the Wild Vah Medoh walkthrough: Second terminal
In this same room, you'll see a hole in the wall just big enough for a round remote bomb. Use a bomb to destroy the stones on the other side and drop another bomb in there. Detonate it next to the switch to open a gust of air, which will push your next bomb over to the breakable wall. Blow that up to reveal a big metal ball.
Hit the switch again to stop the air blowing. Tilt Medoh so the ball rolls toward you and use magnesis through the window to bring it to the same track on which the bombs were rolling. Tilt Medoh to the opposite direction and the ball will roll with enough velocity to fully depress the big switch, opening the door and allowing access to the terminal.
Zelda: Breath of the Wild Vah Medoh walkthrough: Third terminal
Grab that giant ball again and carry it up the ramp. Extend it to the very edge of magnesis' reach and drop it on the right, as suggested by Polygon. You can then use magnesis to put it in the room across from the one you're in. Go inside and make sure the positioning is just right before tilting Medoh to make the ball hit the switch with enough velocity to push it in all the way. Doing this correctly will unlock the third terminal.
Zelda: Breath of the Wild Vah Medoh walkthrough: Fourth terminal
Drop down and go back out to the perimeter where you destroyed some eyeballs at the beginning. Head over to Medoh's right wing and tilt the beast so you have a clear flight path to the other side. Paraglide over there and you'll find the next terminal.
Zelda: Breath of the Wild Vah Medoh walkthrough: Fifth terminal
Fly back to the other side and run through the main lowest room, turn left and walk up the nearby ledge. Shoot the eyeball in the distance with an arrow to clear the corruption. If you tilt Medoh up high, a gondola from the other side will come to you. Get on it and tilt back in the other direction. The fifth and final terminal is waiting on the other side.
Zelda: Breath of the Wild Vah Medoh walkthrough: Windblight Ganon boss battle
Use one of the upward-blowing fans to fly to the top of Vah Medoh, where you'll find the main terminal. Polygon recommended having plenty of bomb arrows for this fight, and I agree.
The key to this fight is using updrafts to your advantage. There are plenty of fans on the ground you can use to get up in the air. Once you're in the air, hold the right trigger to slow down time and pull out your bow. Rain bomb arrows into Windblight Ganon's face to do a ton of damage. It'll eventually fall to the ground if you also want to do melee damage.
That's really all there is to this fight. It'll occasionally summon tornadoes you should try your best to avoid, but as long as you have sufficient heart containers and food, you'll be fine. Congratulations and enjoy the extremely useful ability you get from finishing Vah Medoh.
Check out more Zelda: Breath of the Wild news and coverage
Find out all there is to know about Zelda: Breath of the Wild, including what it took to make the game, how to preserve your items, how to beat bosses like the Stone Talus and Lynel, the best recipes for Link and how to take on the game's shrines. You'll also want to find out where all the great fairies are in the game and how to use amiibo with your version of Zelda.