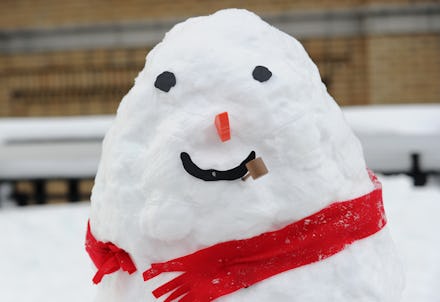
How to Build a Snowman — the Right Way

Making a snowman (or snowwoman/snowperson) is among the most idyllic of wintertime activities — but it's actually a lot harder than it seems. Never fear, because we've got a handy guide that will ensure the best snowman on the block this winter.
Snowman Making Step 1: Gather supplies
Everyone knows that the classic snowman wears a snazzy top hat and has coal eyes paired with a jaunty corncob pipe, but most 21st Century households don't have those supplies on hand. Never fear, buttons or pebbles also work well as eyes, sticks are perfect for arms, a carrot is obviously the perfect nose and any spare hat or scarf will make your snowman look perfectly accessorized. Or you can be lazy and buy a kit.
Snowman Making Step 2: Pick the perfect location
Choosing the right spot for your snowman is half the battle. Do you want your snowman out on the front lawn, so neighbors can admire it jealously? Or do you want your snowman in a public park, where it may live a shorter life but will live it among the people? Building your snowman somewhere particularly windy may mean it will blow away in pieces, which can be pretty freaky, so choose carefully.
Snowman Making Step 3: Begin to pack the snow
The best snow for making snowmen is the kind that falls when the temperature is "around 32 degrees," according to the Chicago Tribune's investigation into the best, most packable snow for snowman-making. The snow needs to be on the wetter-side to hold together well, but still dry enough to be easily molded. Start a snowman by rolling the largest ball, which will be the base, and then two smaller ones, for the torso and head.
Snowman Making Step 4: Assemble the body
"The optimal diameter ratio for the snowballs is 3:2:1 from bottom to top," reports Smithsonian.com, so stick to the traditional snowman shape if you want your creation to stay standing. Make sure the three different parts of the snowman are all tightly packed on their own before stacking, then assemble them on one another with the smallest at the top.
Snowman Making Step 5: Customize
Now's the time to use those accessories to turn your snowman from a faceless pile of frozen water into a friend. Your snowman obviously deserves the basics (arms, mouth, nose) but beyond that, get creative! Is your snowman a zombie? A sports fan? A parent to a tiny, baby snowman? Go wild.
Snowman Making Step 6: Enjoy your snowman
You did it! Bask in the companionship of your new snow friend.