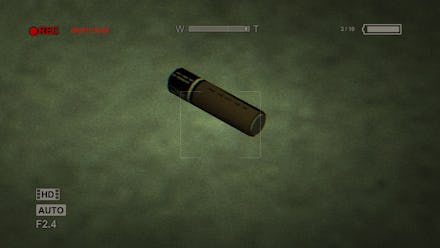
'Outlast 2' Battery Guide: How and where to find the game's most important resource

If you're playing Outlast 2, you're going to need batteries. If you want to get from point A to point B without too much hassle — and survive the night — you'll need a reliable light source. That means knowing how to look for batteries for your camcorder and making them last. If you want to escape Temple Gate alive, you're going to have to learn.
Luckily for you, we've played the game and have the details on everything you need to know about batteries, their usage, how to get more and how to make what you've got last.
Outlast 2 battery guide: What batteries are for
Just like in the real world, Outlast 2 batteries are used to power your camcorder. Similar to the original Outlast, you carry a camcorder that records important footage, zooms in and out, detects sound and offers night vision so you can make some sense of the pitch-black darkness around you.
The camcorder is instrumental in avoiding enemies and figuring out where they're coming from in the first place. If your camcorder runs out of batteries, you're as good as dead if you can't see where the enemy is approaching, so make sure you're fully stocked at all times.
Outlast 2 battery guide: How to find more
You'll have to scour Outlast 2 for additional batteries. They're hidden in random locations throughout the world and will show up as bright white items you can see on the ground, near tables and other various places. You'll have to constantly explore to find all the batteries, so train yourself to look for glowing items in every new location.
Unfortunately, since battery locations are randomized, you can't rely on a guide to tell you where they're hidden.
Outlast 2 battery guide: How to get the most out of them
If you walk around the entire game with your camcorder on at all times, you're eventually going to run out of power faster than you can replenish it — no matter how many batteries you find. So before you track every sound or investigate every single place with your night vision on, put your camcorder down and remember to conserve energy.
Most of the areas in Outlast 2 are dimly lit, but they should be bright enough for you to get around. Wait until you see an enemy or sense that one is near to turn on your night-vision feature, and hold off on using sound tracking until you're absolutely sure there's an enemy milling about. You don't need to continuously track them or keep searching with your camcorder when your eyes are perfectly suitable on their own.
You can also find flashlights, fires, torches and other helpful light sources to illuminate your way through the game in some situations, but enemies can see these items if you choose to use them. They cannot see the light emitted from your camcorder, so make sure to switch it on when you find yourself in dire situations.
If you follow these tips, you should be able to run on limited battery power in nearly any Outlast 2 area.
More Outlast 2 news, updates, tips and tricks
For more on the latest entry in the Outlast series, check out the rest of what Mic has to offer. Here's a guide on the Outlast series' storyline, and here's one with beginning tips and strategies. Here are some tips on beating the finding bandages and the batteries. Finally, here's our guide hub where you can find all our Outlast 2 content.